
Teen Titans
DC Comics
Why I chose this cosplay:
I don't why but I was always attached Raven since I first read her in Mike McKone's run in the 2000's. She's so mysterious and reserved. So anti-people, like me! Her design is so elegant.
I didn't have to do much research as I had all the details in my mind because my Teen Titan comics are so well loved.
Design Process:


There is also some internal structure of the hood. Where I would place interfacing and supports and such. The top image is just overall look with some makeup and seam choices.
Finding materials:
I had in mind a material from JoAnns for many years. A dark blue suiting that was super silky and flowy! But still wanting the explore my options and afraid of using a non-stretch material for a superhero costume, I explored my options. I ordered my first swatches from SpandexWorld.com. All except for one were unacceptable (too thin) but the one that was good was perfect! A metallic (not metallic foil) navy blue milliskin. And it was an almost perfect match in color and texture!
The search for a cheap lacefront was not hard as I found a seller earlier on ebay for Azula's wig.

Pattern Drafting:


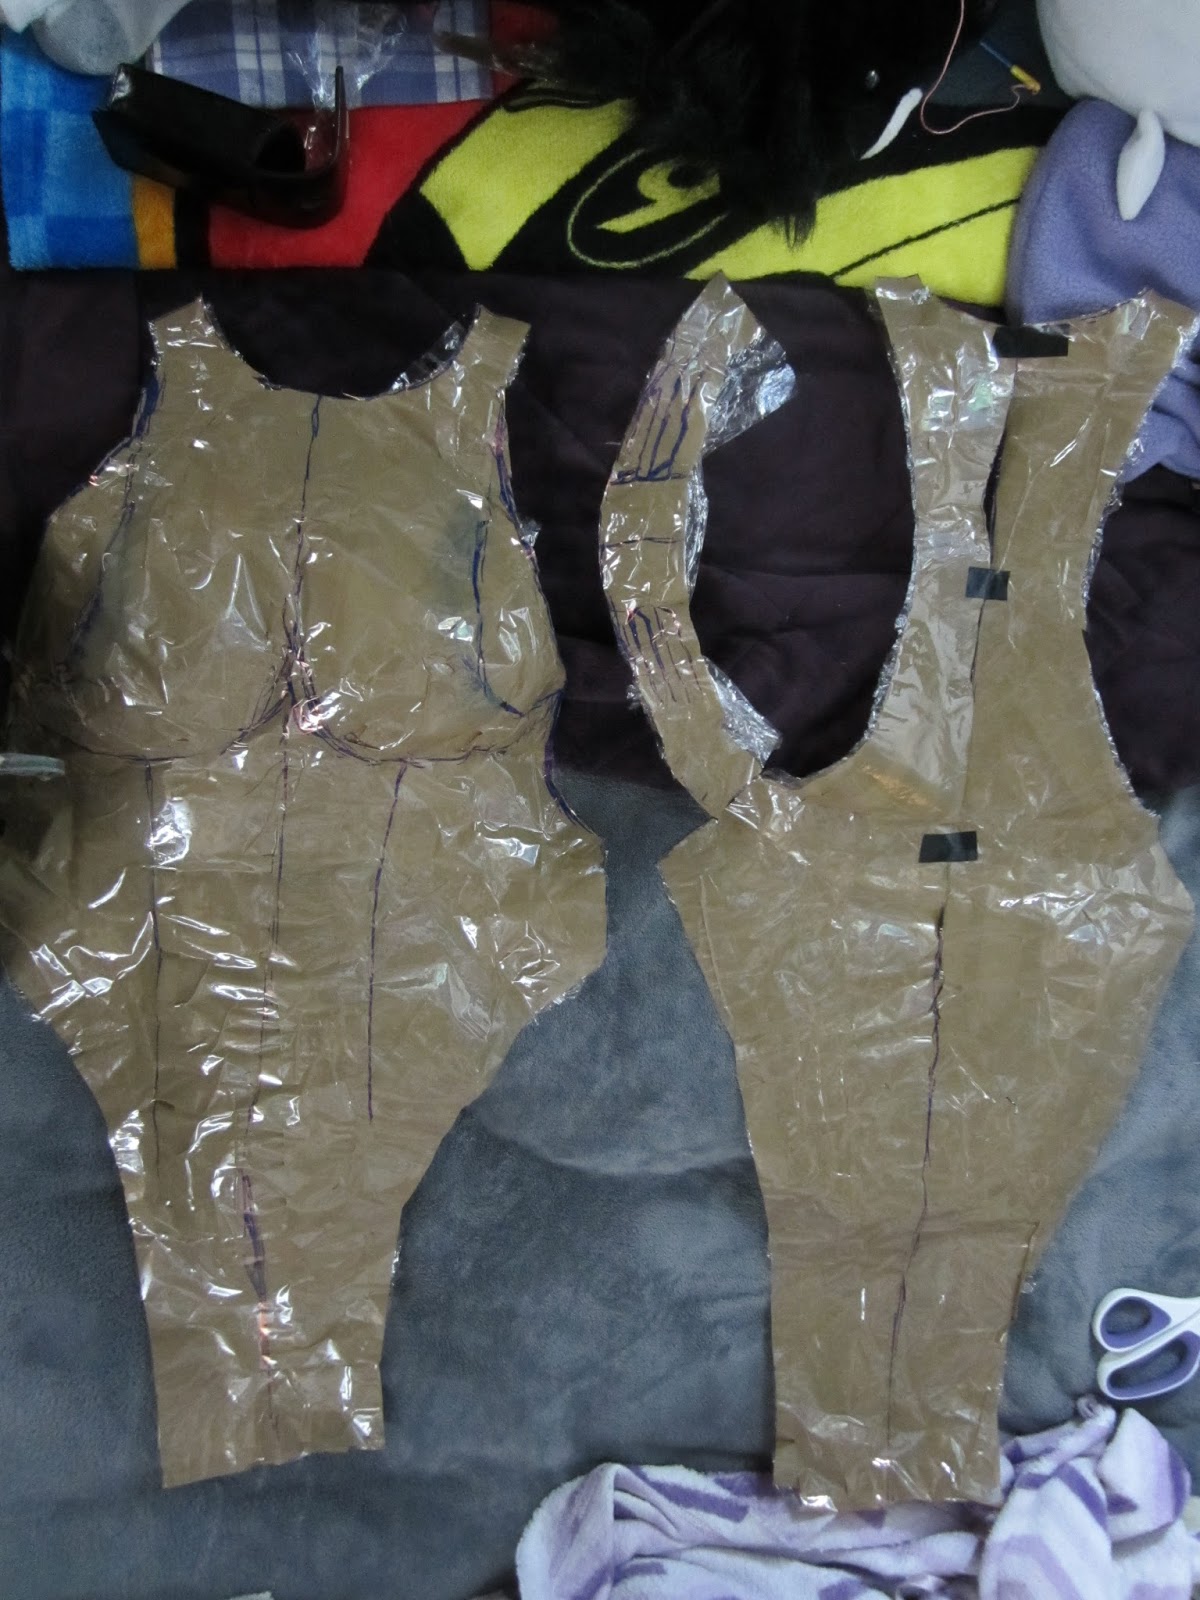


I began by drafting patterns directly on my duct tape dummy. I used packing tape and saran wrap to transfer the pattern off. Since this was my first time using this method so I went to the extra touble doing a fabric mockup. I tested out some extra seam so see what it would look like. I only ended up using these for the under leotard.
For the cape I messured from my shoulder to feet with a few more inches for the heels. I then drafted a wing shaped cape.


Constuction:
I don't remember what I made first but both ending needing fittings and additional taking in. This was mostly due to the indivual properties of the fabrics. I also lost a bit of weight while I was making this costume.
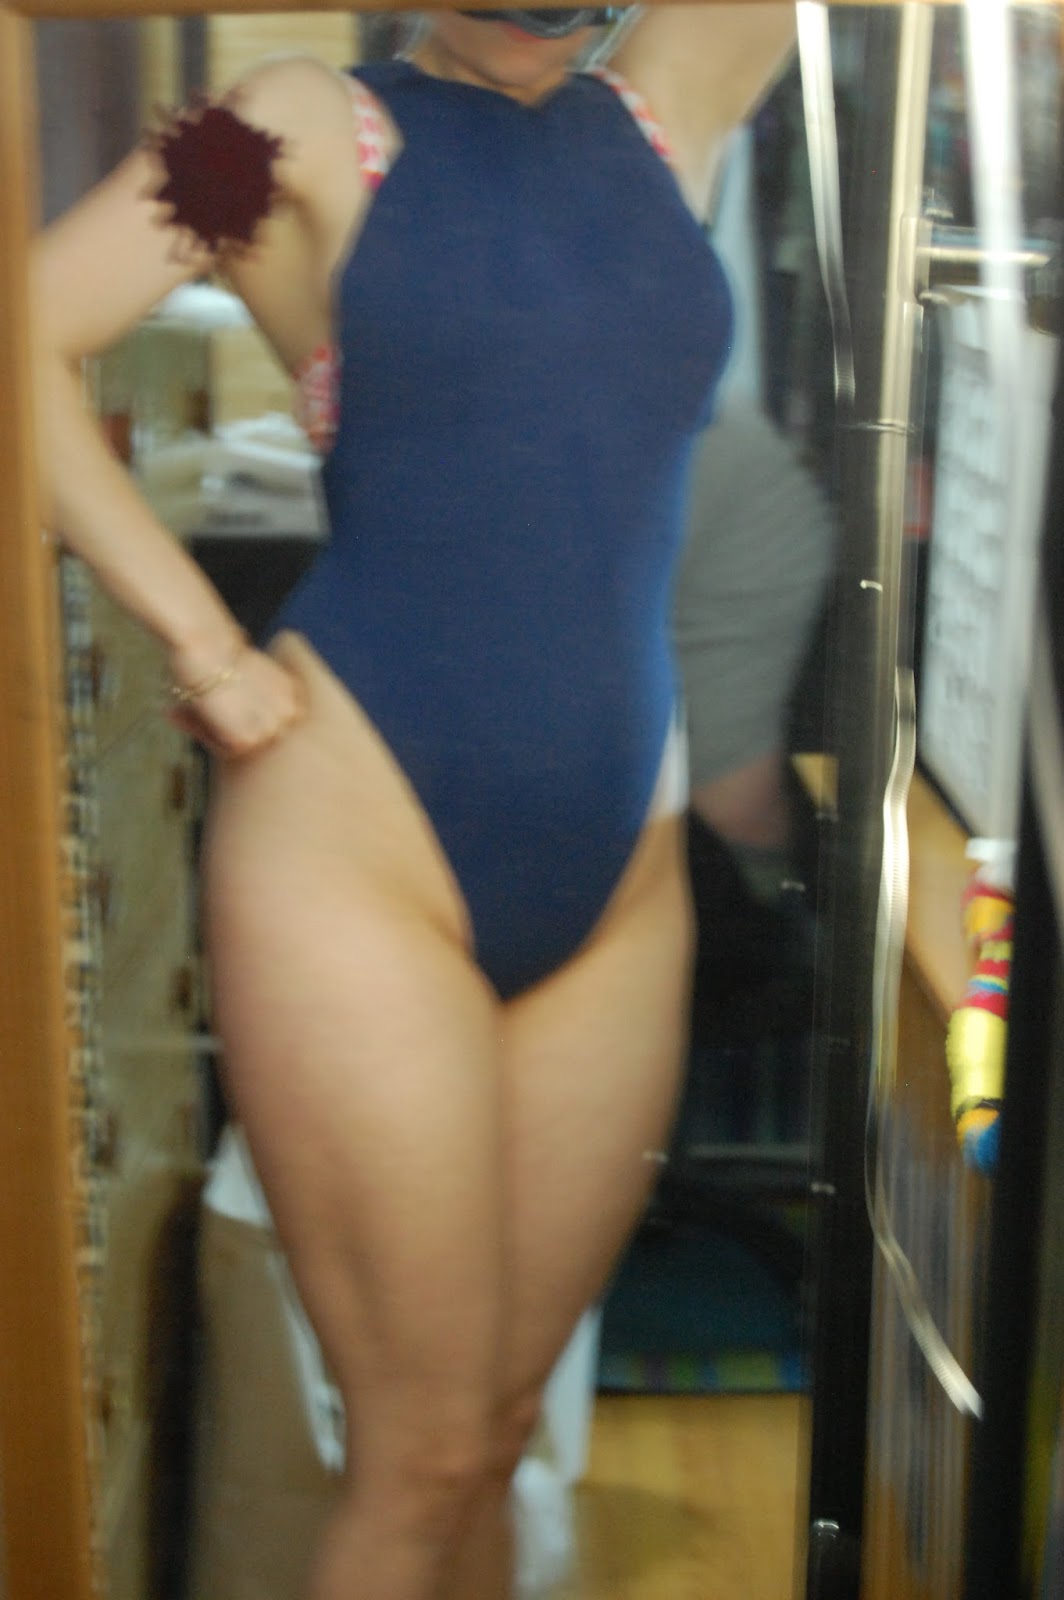
After a test with the swatch I decided it was safe to cut the fabric exactly on the seam lines. Yep that means none of edges were finished. Which means I had to cut the fabric very carefully.

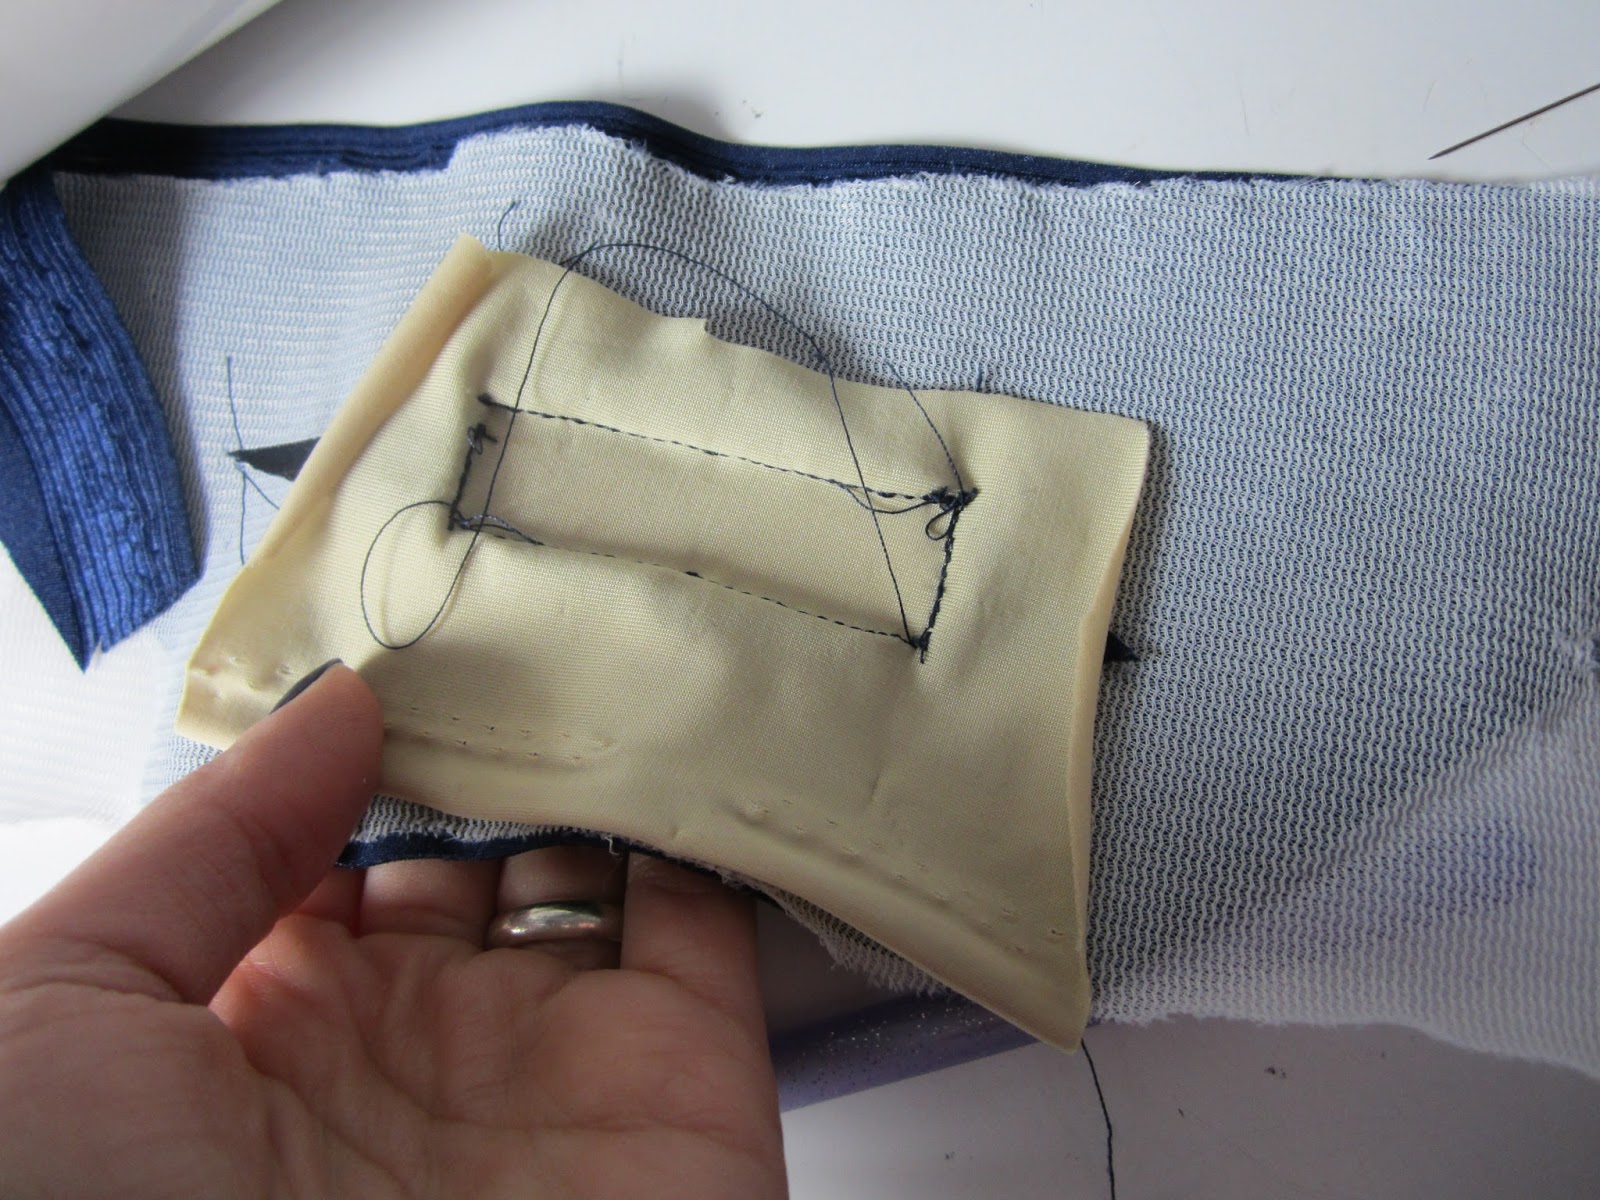
The most difficult part was the "windows" it was clear after making a sleeve that they needed to be stablized to keep their. Still very intent on making a seamless as possible I did all these micro seams on the back of the windows. I cut the window out in an x pattern leaving tiny triangles to sew the skin tone fabric to.


Where the hood and cape meets I slipped in some D-rings, these hold on the cape. I slip these trough a slit in the dress and hook them into the leotard. The silver discs cover this hot mess up.
The broaches or silver discs are made of two layers of worbla stuck to themselves. I basicly followed Kamui's youtube video on boobie bags to do this. I just used a larger dome so they weren't so curved. I used steam because I didn't have a heat gun yet. I then put a lot of filler primer on them and sanded forever. I used Kyrlon's Premium Chrome Paint. I would strongly advise putting a clear coat on this stuff because it rubbs off or the shine dulls out with touch.

The discs just tie on with straps that were glued to the back.
The hardest thing I had finding were pale or irvory or cream colored tights. I only was able to find these in the U.K. I tried twice before I got a pair that had a nice dienzer to them. Orginally I used double sided tape to attach the boot covers to the tights. Recently I sewed the boot covers to the tights. I used a small zig zag stich to do this. It looks a lot better than the tape and is nearly invisable. I wish I had done this originally because the tape was really hard on the material. It just took a lot of pins and a lot guts lol. You have to pin it while it's on you or if you have secound of your leg then you are lucky.
Makeup:
I used Mehron's Starblend in one their palest colors. I used it on my face and sides and arms. The jem is glued on with spirit gum.
Finished Product!


.JPG)

This is awesome! You're amazing!! :)
ReplyDeleteCould you possibly post the pattern. I'm wanting to make my own, and I can't find anything concrete
ReplyDeleteIn the beginning of this post I show how I made my patterns. People's bodies vary greatly in shape and proportion, my patterns where made specifically for my body and would be useless to anyone else. If you do not have a dress form of yourself, this pattern could be accomplished with perhaps a helper to reach your back.
Delete