
For as long as I can remember I've loved Starfire. I started reading the Mike McKone run in middle school/early high school. So I never really liked the Teen Titans show in general or Starfire. The comic book Starfire was always the one and only Starfire for me. I never saw Starfire as the big titted, scantily clad sex-symbol. I saw the awesome color scheme, wicked hair and awesome eyes. Her personality was a total bonus too. She didn't take crap from anybody.
From the beginning, I had in mind that I couldn't pull Starfire off, body type wise. I really wanted to make an as close to comic art as possible. So, I always thought I would need someone to model Starfire for me. But for the longest time I couldn't find anyone who was willing to be that naked in public. Until my sister decided to get into cosplay and she was perfect!
 Design: Mike McKone. I was a huge fan of his run in the Teen Titans in the early 2000's. I really feel like McKone's design of Kory is perfectly a contemporary version of Starfire. Timeless but modern. I of course took in every other image of Kory on the internet ever thanks to comicvine. But I've wanting to do Starfire for so long that I had all the reference I ever needed right in my head. Among a few images from Adam Hughes I also paid careful attention to George Perez original artwork.
Finding the Right Stuff: The Search for Materials
(I'll talk about each material more in detail in their own section further down in the construction area).
I ordered a ton of swatches from SpandexWorld.com and went over with them with my sister. We pick a four-way stretch with metallic foil.
It was impossible to tell what wig color I was actually going to end up with despite many many days of searching through ebay. I knew which color I wanted, I wanted to go with George Perez's auburn but I ended up with a bright wine red. Oh well, the point was to avoid orange so that hair didn't blend in with her skin.
It took a long time and lot of research to decide on a body paint. The peps on the Homestuck forums and such kept raving about Mehron Paradise (and that's when I got addicted to Mehron).
So I got Mango and Orange. I was very very picky about getting exactly the right color for her skin. I wanted the color McKone version. Somewhere between her original "golden" color and the straight orange they sometimes mis-color her. I will talk about application later on.
I chose wedges as shoes because she doesn't wear heels but is nearly seven foot, so I wanted to create the illusion that she was wearing flats as much as possible while achieving maximum height.
Patterns: Drafting patterns for Starfire was fairly easy, since I had a duck tape dummy of Verona (my sister). I was able to draw directly on the duck tape with a shapie and put everything exactly where I wanted it. From there I transferred the pattern to saran wrap and tape then to butcher paper. All the other patterns were also done this way. I created a mock up out of old t-shirt just to make sure because I had never actually drafted stretch patterns before. Which by the way, didn't help at all because the stretch factor of t-shirt and milliskin foil were completely different. So I didn't end up taking enough out of the pattern horizontally for it to fit right. So the design on the hip became skewed to the back because the only seam was located in the back. I attempted to fix this in monokini v2.0 but I still didn't take out enough!


Assembly: I had decided to not to sew my edges on the monokini but instead cut them raw with no seam allowance. The type of fabric I used allowed me to do this (but I didn't know this until I got the sample swatch). Tip! If you do have to sew the edges of a single layer of spandex it is only really possible to do this with a walking foot (mine was $20 and I've already used it a ton) or some kind of stabilizer. But I really do recommend the walk foot because stabilizer is a hassle and basically throwing money down the drain. But if you are in a pinch, I often use regular paper I have lying around.

So as long as you have the right fabric and don't over stretch it the edges will stay clean. Another key to this technique is have an extremely clean cut edge. I did this by cutting then sliding the sizors into the crack of the first and continuing like than until you are done. Really clean edges can also be achieved with a fresh blade of a rotary cutter. I know others cut fabric with a soldering iron, which is neat because it cuts and seals the edge of the fabric at the same time. The edge can also be sealed with glue.
Every other edge was finished with parachute cord wrapped in fabric for piping. The collar section, arm band, and vambraces were craft foam covered with fabric, using E6000 glue. (Tip! Use contact cement works a lot better for fabric to craft foam applications like this).
All the gems (except for a small oval ones) were cast by me using epoxy resin. All were simply glued straight to the fabric with E6000, so as the color of fabric became the color of the gem. The large red gem was backed with acyclic paint and foil.


I also added a few foam rollers nestled in between to weft as insurance against deflation.


Contacts: There many options to go with and through research I found out you can't cover the pupil or you can't see (ur duh right, but I didn't know that). I thought of going with green scalera contacts with a pupil opening but they were ridiculously expensive. Not only that but it would be a ridiculous choice to start a non-contact wearer with. Also the four hour wearing limit. So I was lucky and found a relatively new product, a white out lens made of a mesh pattern. This allowed the wearer to partially see while creating the white-out look from a distance. I chose the white color over green mesh lens because I wanted the overall pupil/iris-less look. I thought any other color than white would disrupt that effect. I also thought it would make it easier to photoshop the eyes later.

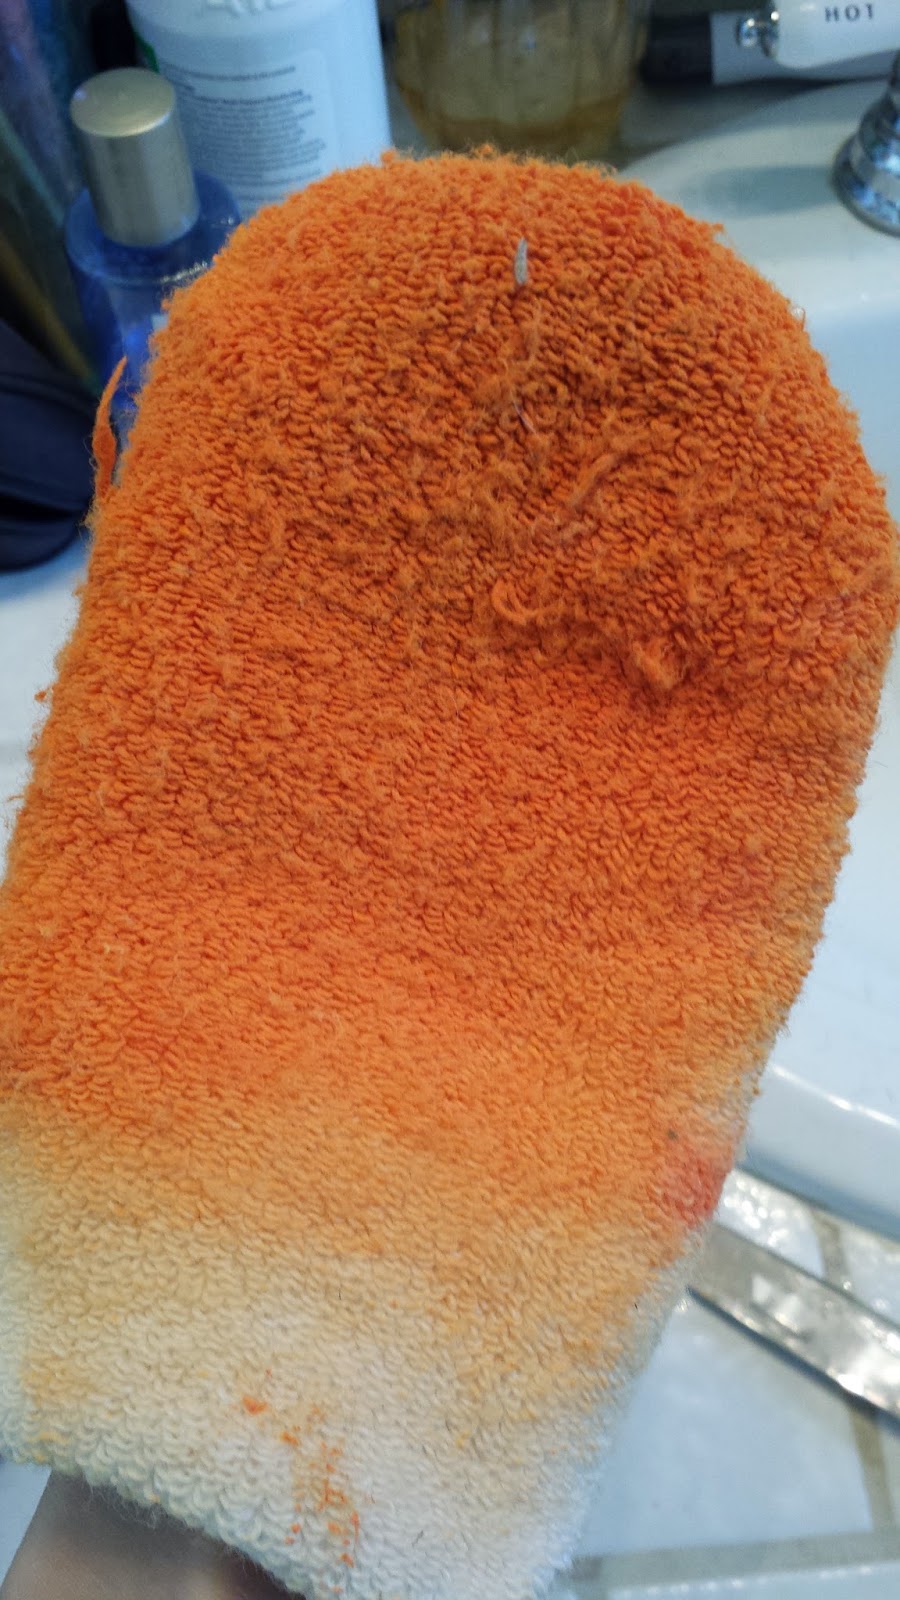
Makeup Application: The first time I applied Starfire's make it took 4 hours alone to do the body makeup. I began by applying the Mehron Barrier Spray. I began with two layers of Mehron Aquacolors in Mango. Which was really difficult because as I added new layer the old layer would reactive and all of the color would lift up. I then applied Aquacolor Orange. I would apply a section of wet aquacolor and then swirl the reactivated layers into one color. I applied the makeup with a one inch chip brush. I would recommend using something with smoother bristles as there will be less streaking. The next part is the key! After the paint has fully dried (doesn't take long) I took a rough cloth (like a wash cloth) and buffed out the paint. This removed the majority of the streaks due to the paint brush. But this will not remove really bad paint strokes, so blend the best as you can you first apply it. Finally I "seal" the paint with a loose finishing powder. I didn't like the way the barrier spray looked on the Aquacolors so I used this. It pretty much didn't rub off at all.
Here are some photos from the second application, which I did differently and will write a separate post about later:

Monokini and Legging Application: The monokini and leggings were held on with a lot of double sided tape. It took over a half hour to apply all the tape just because it is a giant pain in ass to get the backing off the tape. I used something called red devil tape (high adhesive tape). Which I don't even know if that is its real name because my mom brought it home many years ago from work. Its a good strong tape but not to strong. It sticks to cloth well and skin too (if you didn't put lotion on... always have a clean canvas for tape or glue, alcohol swab!) SO the monokini was held on by mere tape, so center support strap at all. I thought if I put enough tape I could defy the laws of physics. NOPE. LOL. At least not the way I made the first monokini.


.JPG)

Beautiful Starfire! Great cosplay, amazing makeup and a wonderful write up! Thank you for sharing!
ReplyDeleteThis comment has been removed by the author.
ReplyDeleteThis is absolutely amazing! You've done a fantastic job! Congratulations for the cosmaker and cosplayer.
ReplyDeleteI also love Starfire, she's such a great character and, sadly, so often underestimated or perceived just as a 'hot body'. The New Teen Titans by Wolfman and Perez is one of my favourite comic books ever, and they were able to show multiple aspects of her personality and power, the struggles of her cultural difference on Earth. All of that turned me into a big fan of hers.
I'll be cosplaying Starfire in December, but since I'm not very confident about my body image I'll do a version of the current look in her title by Amanda Conner. It's nowhere as complex as the one you did, but this post really inspired me!
Best wishes from Brazil :)
Laís